
Do you want to know how to reset and repair your Roku remote that is not working at all? Well, then you gotta be glad, as you have finally found the perfect blog. Now as you read along, you will come across the steps and procedures that will surely help you get through easily, and you should be all good to manage your Roku remote without any difficulty.
What to know before you reset your Roku remote
You need to know that there are two types of Roku remotes, such as the following:
- Enhanced Remotes: This remote is a ‘Point Anywhere’ remote; it controls the screen no matter which way you point the remote. This is because the Roku devices and remote are connect over a wireless network. Moreover, Roku’s ‘Enhanced Voice Remote’ and ‘Gaming Remote’ both fall into this category.
- Standard infrared remotes – This is a simpler remote that requires a direct line of sight to operate. Hence Roku’s voice remote and simple remote both are in this category.
You must keep in mind that you can only reset an enhanced remote; the infrared remote cannot be reset (it doesn’t need to be) as it works with any compatible Roku player just by pointing directly at it. Nevertheless, if an infrared remote is not working, then you should try and replace the batteries.
Furthermore, most Roku models come with an enhanced remote, and these models include the ‘Roku Streaming Stick, Roku 2, Roku 4, Roku Premier, and Roku Ultra.’.
What Is The Process To Reset The Roku-Enhanced Remote?
To be able to reset your remote, you will need to take out the batteries, unplug the Roku device, and then plug it back in, replace the batteries, and hold down the reset button until you find the remote is repaired.
Follow the step-by-step instructions below:
- You need to first remove the batteries from the remote.
- After that, you should unplug the power cable from your Roku player, then wait for 5 to 10 seconds and then plug it back again.
- Next, when you see the Roku home screen displayed on your TV, you must insert the batteries back into the remote.
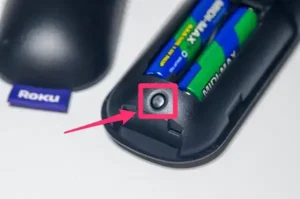
- And then you need to press and hold the reset button; it is located in the battery compartment for about 5 seconds.
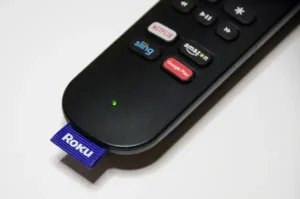
- Now you should see the pairing light on the remote flashing. The repair process will take about 30 seconds to complete. After it’s finished, a notification will appear on your screen.
Other Ways For Fixing A Roku Remote Not Working
Now, in case your enhanced remote still does not work even after you reset it or you’re using the standard infrared remote, then you may need to try other methods to get it fixed. Hence, if all other methods fail, then you should consider replacing the remote.
1. Make Sure The Roku Remote’s Batteries Aren’t Drained
Now if you have been using your remote for a while, then chances are that the battery may have drained out. If this is so, then it can be a problem for your remote and not allow it to work because it has nowhere to draw power from. Therefore, you must open the battery compartment that is on the back of the remote and then insert either two AA or AAA batteries.
2. Check For Any Wireless Connection Issues
If you are using the enhanced remote that uses your local Wi-Fi network, then problems with your wireless connection can also affect the performance. You should know that your wireless network does not need to have internet for your Roku device and remote to be connect; however, if the router has malfunction in some way, then you may want to look into the case.
For instance, if you are facing software-related issues, then you can access the router’s settings to check if there are unusual configurations or if a firmware update is available. And if the issue is a hardware problem, then you can directly contact Roku to fix it or to replace it, provided only if your device is still under the warranty period.
3. Choose To Use An HDMI Extender Instead
This is if you are using a Roku Stick that is the Roku model and you need to plug it into your TV’s HDMI port, then you could probably experience problems with the remote due to HDMI interference. The good news is that you have the option to order a free HDMI extender for your Roku stick, which is a great help as you just need to place the HDMI extender far away from the HDMI port.
4. Choose To Use The Roku App As A Virtual Remote
To be able to solve the Roku remote not working problems, you can also choose to use the Roku app as a virtual remote instead. You can search for the guide on how to use your iPhone as a fully functioning Roku remote as well. The procedure is the same on Android devices; you would only need to download it with an Ethernet port so that you can connect your Roku device to the router and then also connect the app wirelessly.
NOTE: To be able to connect the Roku app and the device wirelessly, you need to remember that both devices must be on the same Wi-Fi network. If not, you would choose to use an Ethernet cable on the Roku models with an Ethernet port to connect the Roku device to the router and then connect the app wirelessly as well.
5. You Can Factory Reset The Roku Device
If you have tried all the above solutions and your Roku remote is still not working, then you can just go for resetting the Roku device back to the factory settings. You must already know that doing so will give your Roku a blank slate, which means all the settings and personal preferences will be erase, but this step could definitely get your remote to work again.
Related Articles:-
Conclusion
We trust that you find this article useful, and now you are able to get local channels on your Roku TV without any hassle. However, if still you are facing any problem or you have some related concerns, then without any other thought, you can call Our Geeks Tech Support Number at +1-888-256-6612 or you can live chat with our experts.