

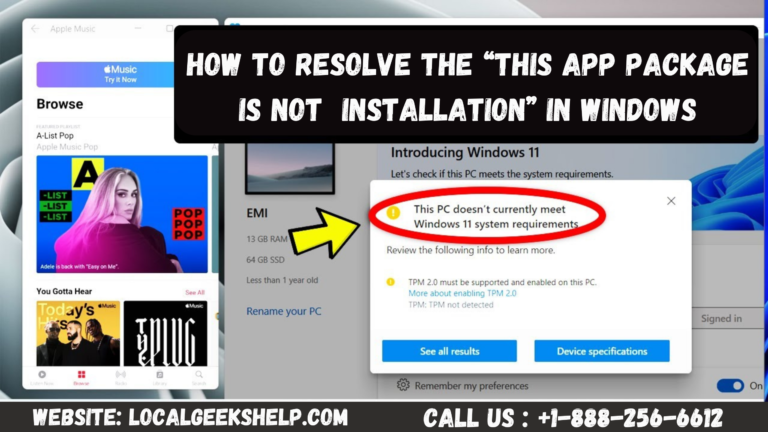
If you want to resolve the “This App Package Is Not Supported for Installation” trouble then must go through this article instantly. Here, you will find the simple steps for resolving such issues, so move ahead and must reach the experts on the helpline number for any app package-related queries.
Call Customer Support: +1-888-256-6612
Why won’t your Package Installer install apps?
If you are facing some difficulty while installing the apps due to insufficient storage space then you need to instantly clear the cache data as because of that, you can face such issues too. Or, you can face this because of the app installer’s corrupted-related trouble. Sometimes, this can occur because of compatibility trouble. You need to just try to update the app installer to its latest version instantly.
Read Also: All Options Greyed Out in Disk Management [Fix]
Instant steps to resolve This App Package Is Not Supported for Installation in window issue
For fixing the trouble, you need to follow these steps as follows:
- Enable Developer Mode
- Check App Package Compatibility
- Check for Trusted Certificates
- Use PowerShell for installing the App Package
- Update C++ Redistributable as well as .NET Framework Packages instantly
- Check App Installer Event Log properly for Errors
In details:
1) Enable Developer Mode
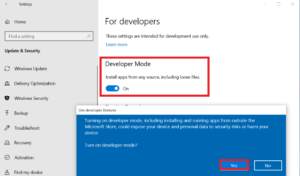
- You need to, first of all, hold down the windows key and I together for opening settings on your respective device.
- Go to privacy and security and then you need to go to developer instantly.
- Finally, you need to turn on the toggle switch that you will find beside the developer mode.
2) Check App Package Compatibility
- You need to properly check if the app package is compatible properly with the version of windows that has been installed on your respective device or not. This can be due to some windows update issues. You need to instantly look for the package for the related corruptions and if you find any such then you need to instantly redownload the respective package.
3) Check for Trusted Certificates

- For resolving this, you need to, first of all, open the certificate management tool as an administrator and then you need to instantly import the certificate.
- After that, you need to re-run the app installer and then you can instantly check out the same.
4) Use PowerShell for installing the App Package
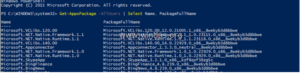
- You need to, first of all, open the windows PowerShell as an administrator on your respective device.
- After that, you need to write down the command: Add-AppxPackage -Path $FilePath and then give a tap on enter option.
- After doing so, you need to simply replace the file path with the location of the respective application package. After the execution, it will instantly install the app package instantly.
5) Update C++ Redistributable as well as .NET Framework Packages instantly
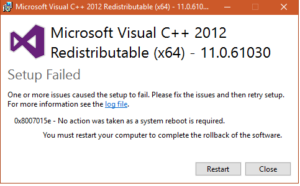
- You need to instantly update C++ Redistributable and .NET Framework Packages on your respective device. You need to update it to its latest version then only, you can resolve such issues with the same.
6) Check App Installer Event Log properly for Errors

- First of all, you need to go to the start option and then you need to look for event viewer and then you need to instantly open the same.
- Go to the event viewer and then open it.
- You need to then event viewer and then go to the following path: Logs > Microsoft > Windows > AppxDeployment-Server
- You have to then instantly look for the errors step by step and then you need to check if any one of them is causing some installation-related troubles.
How to instantly fix App Installer not working trouble?
To fixing App installer not working in trouble, you need to, first of all, restart your device instantly, and then you need to look for the pending updates. After that, you need to simply modify the installer settings and then look for its compatibility. Also, if this process doesn’t help then you need to instantly uninstall the previous software version and then you need to instantly perform the system restore.
How to install an appx file in windows 10 via PowerShell?
For installing an appx file in windows 10 via PowerShell, you need to, first of all, open windows PowerShell as an administrator on your device. After doing so, you need to write down the command: Add-AppxPackage -Path AppxPath.appx. and then give click on enter option.
Need some help?
If you need some Help with your respective installation app then without giving it a second thought, you need to instantly contact the experts . The experts will assist you the instant solutions, so reach Geeks Tech Support Number +1-888-256-6612 without giving it any other thought right now related to appx file.